Thursday 16 April 2015

Personal Project

For our final project we were allowed to make whatever we wanted, providing it was a challenge to our skills and the time frame manageable.

The costume from Samson and Dehlia was probably going to be far too time consuming!
Queen Amidala has some stunning costumes but this seemed to similar to what some of the other girls in the class were making.


Again to make an exact replica would take too long because it is covered in diamantes.

I decided to make a tutu, as I have never done this before. The costume from the movie 'Black Swan', was what I had decided to make, because it is beautiful yet distressed and wicked. The only down side to making a tutu, is that there is not a lot of help out there, in the way of reference books. I had no choice but to rely on snippets of information I could find on the internet and a book from the college library that dates back to the 1950's. People say that making a tutu is a dying art form, and no wonder because no-one seems to want to share the knowledge of how to make one. 


The Mulleavy Sisters that made the costume worn by Natalie Portman, began with white netting, into grey and then black. For the tutu underskirt. The book recommended 10 layers for the height of my model and 14" being the longest width. Each width requires at the 3 strips that can be then stitched together to make one continuous piece. Some of the top layers need 4 widths, stitched together.


Once I had cut the netting, I put them into rolls with a scrap of paper pinned referring to the width size so that I would not get muddled up and put them in the wrong order when attaching them. One and a half was my smallest net width. I wanted to make the pants the classic way, many people these days make them in Lycra, but I used two layers of soft tulle.
To get the desired shape, I draped the fabric on the stand. They have to be deep to allow for the lots of layers that will be attached. As you can see I have over locked the two pieces of tulle together.
I found it best to make a paper pattern with lines running across them, where I want the netting to be placed. I then traced the lines on to the fabric with a vanishing line marker pen. I could now begin attaching the netting one at a time, with a zig-zag stitch, to allow the netting to stretch. Don't forget the laborious job of gathering the net.
You can see here the netting is taking shape nicely.
That's all 10 layers of netting, but there is still some more layers to go on top of this for the plateau.
Remember not to stitch the netting right to the edge of the pants, seam allowance has to be left so that, when you turn the tutu inside out you are able to stitch the pants together up the back.
This is the skirt laid out flat, you will notice that at the moment I have not closed the gusset. I want to be able to try this on my model to make sure she can pull it on, before I go closing it up and adding elastic.
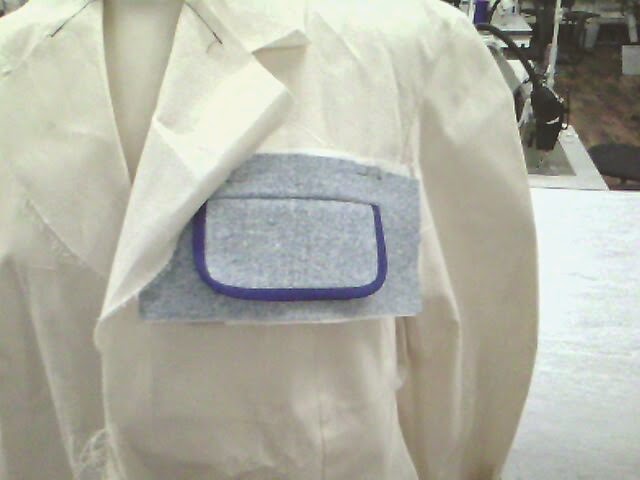
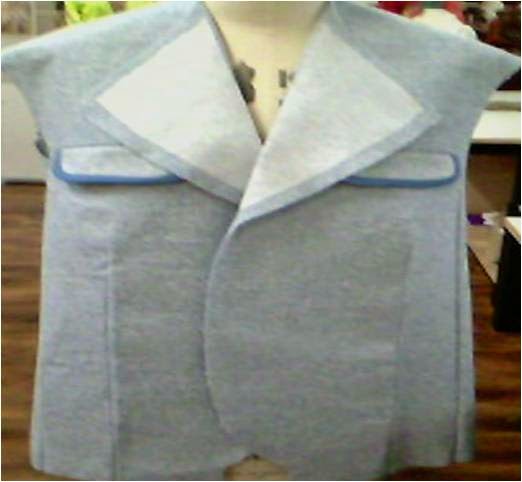
The bodice I draped on the stand and on my model to get the shape right. The corset is made in 8 parts. 
For the real bodice, I made it with a heavy weight stretch satin. I then used metal boning and made tubing for them to be inserted into and I then attached them along the opened seams. I put some plastic boning into the seam that curves along the bust, just to give some extra support.
Before attaching the lining I wanted to put the surface detail on first. To create this mottled effect I had a piece of faux leather bigger than the area it was to be attached to and put it in the oven until it showed signs of melting. This is not something I would recommend, it can give off fumes and it may also go disastrously wrong. When I took it out of the oven, I manipulated it whilst it was still warm to put it into the shape I wanted. 
I then attached the fringe of iridescent coque feather behind it and stitched a piece of black lace over the other breast plate. Sorry the photo quality is not better. The lining can now be attached along the top of the basque.
I put two layers of  black silk chiffon and distressed the ends to look all frayed before putting the final layer on top. I used this Halloween mesh and stitched a black ribbon around the edge.
I also made a casing for metal tubing to be applied into layer 7, to hold it up better.
The basque, which is just a piece of fabric cut on a curve the same measurement as the bottom of the bodice, can now be attached to the basque and tutu. As well as the lining to conceal everything.

I pleated black chiffon and hand stitched it to the bodice. Leaving the edges raw and distressing them by gliding scissors over them to give it a bad ass look.

I stitched some more coque feathers onto the top of the tutu. I purposely did not put them into the seam better the basque and tutu because I thought they may be uncomfortable for the wearer.
Final touches were the application of different sized and shapes acrylic stones, placed on the basque and on the tutu.

This is my sister wearing the costume, the photo was purposely taken at a derelict site to make it appear more menacing. I have not quite finished it yet, hence the skirt not being as flat as a pancake, hopefully I will find sometime to do this!


Monday 8 September 2014

Work Related Brief

Our next project involved making a costume for a client, our client being, The Dorman Museum, in Middlesbrough. As the centenary of The Great War (WW1), was approaching, we were asked to produce replica costume's of those worn by the people of the time. The costume's to be made were chosen by the client, but it was the tutor's that made the decision of the costume given to each student, some of the choice's included; a Tommy, a Sailor, a Suffragette etc. I was given the costume of the Nurse.

I was really pleased with what I'd been given, but it wasn't going to be as straight forward as I had thought.
I soon realised in my early research, that there was in fact lots of different types of Nurse's during the war, each with their own unique costume. I have not included them all as it would take far too long.

The British Red Cross Uniform (Voluntary Aid Detachment - V.A.D)

A colourful view of the V.A.D costume.

Q.A.I.M.N uniform 1901
A Queen Alexandra Nurse


It was decided that it was the British Red Cross Uniform that was wanted for the exhibition. I found researching the actual uniform really quite difficult as nothing much was really ever written about the uniform of the Women during WW1. (Although since the mark of the centenary, many more books have appeared). I had to rely on many websites, some of which I was really grateful for finding, as the writer's of those sites really knew their stuff.
The VAD costume changed during the course of the war, so I decided to make the costume from the start of the war in keeping with the centenary, marking the start.
I was going for a look very much like above, with the blue pinafore dress, white apron with a red cross. Two sleeve protectors, arm band with red cross to be worn on the left arm and the stiff collar. The veil was a later style based on the Q.A.I.M.N headdress, so I went with the Sister Dora style cap without neck ties. (As seen in the first image).

The dress is not sky blue like depicted in many films, TV shows etc. It is actually a grey/blue in a fabric that by today's standards would be classed as a drill or chambray. It has to be made of sturdy fabric for heavy duty work-wear. In fact it is very much like an overall but gathered at the waist.


This is an Nurse's uniform from WW1, which can be found at the Dorman Museum, Middlesbrough. As I was able to get up close and examine this costume I used this for inspiration, although I believe the woman that wore this uniform originally was perhaps already a local nurse as it is not in keeping with a traditional V.A.D costume, although many volunteers made their own due to fabric shortages. The dress is roughly ankle length, with two horizontal tucks that run around the hem for decoration.
The dress opens in front, as we can see here. A placket is inserted which is fastened by buttons. This opening runs from the collar to about knee level.
Here we can see the fastening up close. The buttons are very typical of the Edwardian period. They are fabric covered with a double eyelet.
The apron is made of a heavy linen, this style is very typical of the Red Cross, although it was common place during the war for the volunteers not to have them on their aprons due to shortages of dyes.
Here we can see how the straps cross over at the back and run under the epaulet's of the shoulders. This picture also shows that lap and fell seams have been used to join the fabric together because they are a strong seam and can take the strain of work-wear.
The underneath collar is of the small stand up variety. The attached collar seen here is more typical of the uniform during the later stages of the war. I noticed how gathered the dress is around the neckline. This is because the top half of the dress is rather baggy and it is attached to a fitted 'A' line skirt.
This is the collar that I made, it is a stiff stand up collar that is attached at the front and back by way of studs. Some of these were made in celluloid or rubber but the majority were made of starched linen. Which is how I tried to make it, but I guess today's starch is not made of the same stern stuff and it just didn't work. I then tried a mixture of P.V.A glue with water and this seemed to work very well.
These are the type of studs used.
This is an original arm band, made in a linen with a red felt cross stitched into place. I made mine the same way but I appliqued the red cross in position.

Opened out head cap


This is what the cap looks like when the buttons are brought to the button holes and the peak folded back.


Here is my dress. It is a very baggy top half attached to a fitted skirt. The sleeves are made in two parts. A placket is attached over the opening so that the button fastening is not seen. I used a cotton drill fabric, it was a little too blue for my liking but a near enough match.

This is a close up of the hem of the skirt, the two horizontal tucks can be seen.

My friend Lauren is modelling, my almost finished outfit. The apron still needs the red cross, but the sleeve protectors are made. I fastened them with a button on the cuffs but the tops are tightened by a lace.

My sister Michelle is modelling the final costume. This was on display at the Dorman Museum, Middlesbrough  but I believe this exhibition is now closed. Therefore I should be expecting this costume back any day soon.


Tailoring

Whilst working on our Millinery project in one class, we also had to make a tailored jacket in another. In the past previous students had to learn the bespoke handiwork techniques used by Saville Row artisans, but it proved to be very time consuming which unfortunately led to the project's not being finished on time. So therefore our tutor's decided, we should learn these techniques in our summer break on a jacket size that would fit a toddler. And the technique we would be using for our project, would be the 'fusible' technique. Interfacing and machine stitched being the key components.

The hardest part being which jacket to chose.

I considered making this 'Grace Farrell' suit to compliment the hat I was making, but I wasn't overly keen on the loose fitting. (Photo taken from a screen shot).

I really loved many of the fitted jackets worn by Nicole Kidman in the film 'Australia'. This riding jacket is stunning but decided against it because I fancied making something more colourful. (Photo taken from a Google search).

After researching several more other films and all the other possibilities of jackets to make, I decided that I quite liked the power dressing of Margaret Thatcher and looked at the film 'The Iron Lady' for inspiration. (Photo taken from a Google search).


I chose to replicate this jacket because I loved the colour and style. It also helped that my Mother would make the perfect model.


Thankfully I was able to find many images on the Internet taken from the Hollywood costume exhibition that had taken place at the V&A Museum, which helped me research the full details of the costume.


Firstly, I made my own pattern based on my Mother's measurements. I decided the jacket had a princess seam up the front and back, but there was also a dart in the front panels on either side. The collar was pretty deep, in a 70's style. Both of the sleeves and back panel had a vent. Once I was happy with my pattern I made the toile in a medium weight calico.


Next I wanted to create so samples of the best way to tackle the breast pocket. I decided to carry out the experiments in the actual fabric I was going to use, so that I could test how well it would work. I thought just stitching a fake pocket flap on looked really bulky and unprofessional. Therefore I decided to make a welt pocket.

It was now a case of making the real thing. Here we can see that I have cut the fusible interfacing the same size as the pattern, so that it won't cause bulk in the seams. Then I stitched it together.


I put the welt pockets in place and stitched the flaps in place. It was quite difficult to make sure I had these pockets in the same place. Now it meant I could continue putting the rest of the jacket together.


Sleeves in, front facing in and finally the lining. I even found time to make a matching 'A'Line skirt and a hat.


My Mother had real fun modelling this costume, although she was in the process of dieting and the costume was obviously becoming to big. In the end I ended up taking it in and altering the collar to make it smaller as I wasn't quite happy with it. I also added the buttons to the sleeve vents. 
(All images not from a specified source are of my own work).