I was really pleased with what I'd been given, but it wasn't going to be as straight forward as I had thought.
I soon realised in my early research, that there was in fact lots of different types of Nurse's during the war, each with their own unique costume. I have not included them all as it would take far too long.
 |
| The British Red Cross Uniform (Voluntary Aid Detachment - V.A.D) |
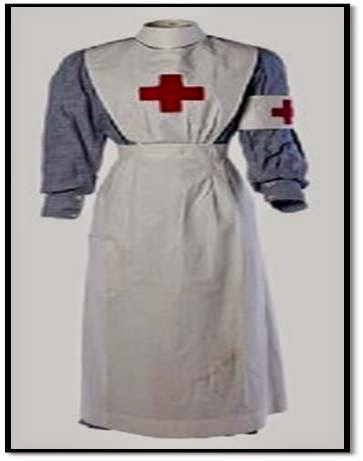
A colourful view of the V.A.D costume.
 |
| Q.A.I.M.N uniform 1901 |
 |
| A Queen Alexandra Nurse |
The VAD costume changed during the course of the war, so I decided to make the costume from the start of the war in keeping with the centenary, marking the start.

I was going for a look very much like above, with the blue pinafore dress, white apron with a red cross. Two sleeve protectors, arm band with red cross to be worn on the left arm and the stiff collar. The veil was a later style based on the Q.A.I.M.N headdress, so I went with the Sister Dora style cap without neck ties. (As seen in the first image).
The dress is not sky blue like depicted in many films, TV shows etc. It is actually a grey/blue in a fabric that by today's standards would be classed as a drill or chambray. It has to be made of sturdy fabric for heavy duty work-wear. In fact it is very much like an overall but gathered at the waist.

This is an Nurse's uniform from WW1, which can be found at the Dorman Museum, Middlesbrough. As I was able to get up close and examine this costume I used this for inspiration, although I believe the woman that wore this uniform originally was perhaps already a local nurse as it is not in keeping with a traditional V.A.D costume, although many volunteers made their own due to fabric shortages. The dress is roughly ankle length, with two horizontal tucks that run around the hem for decoration.

The dress opens in front, as we can see here. A placket is inserted which is fastened by buttons. This opening runs from the collar to about knee level.

Here we can see the fastening up close. The buttons are very typical of the Edwardian period. They are fabric covered with a double eyelet.

The apron is made of a heavy linen, this style is very typical of the Red Cross, although it was common place during the war for the volunteers not to have them on their aprons due to shortages of dyes.

Here we can see how the straps cross over at the back and run under the epaulet's of the shoulders. This picture also shows that lap and fell seams have been used to join the fabric together because they are a strong seam and can take the strain of work-wear.

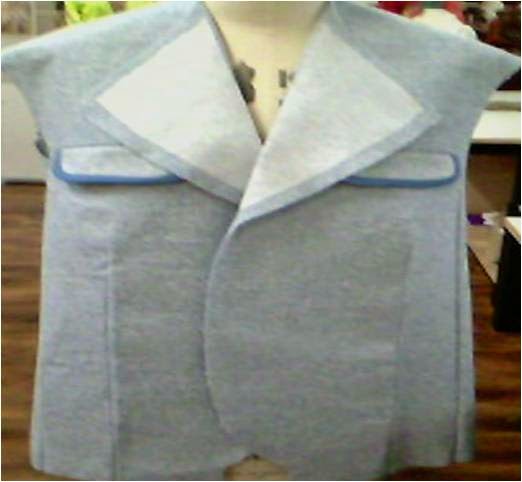
The underneath collar is of the small stand up variety. The attached collar seen here is more typical of the uniform during the later stages of the war. I noticed how gathered the dress is around the neckline. This is because the top half of the dress is rather baggy and it is attached to a fitted 'A' line skirt.

This is the collar that I made, it is a stiff stand up collar that is attached at the front and back by way of studs. Some of these were made in celluloid or rubber but the majority were made of starched linen. Which is how I tried to make it, but I guess today's starch is not made of the same stern stuff and it just didn't work. I then tried a mixture of P.V.A glue with water and this seemed to work very well.

These are the type of studs used.

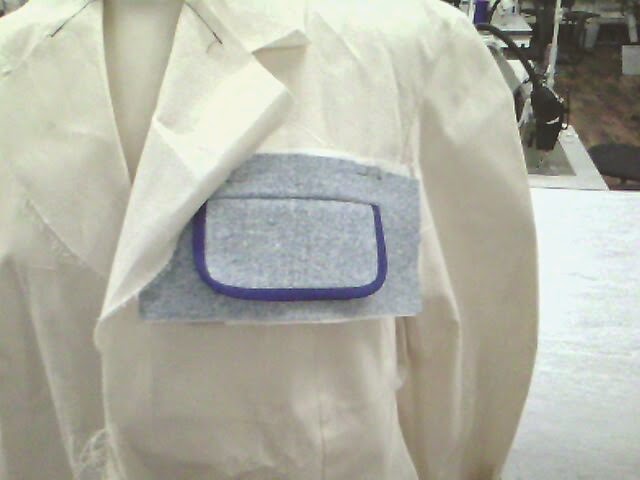
This is an original arm band, made in a linen with a red felt cross stitched into place. I made mine the same way but I appliqued the red cross in position.
 |
| Opened out head cap |
 |

Here is my dress. It is a very baggy top half attached to a fitted skirt. The sleeves are made in two parts. A placket is attached over the opening so that the button fastening is not seen. I used a cotton drill fabric, it was a little too blue for my liking but a near enough match.

This is a close up of the hem of the skirt, the two horizontal tucks can be seen.

My friend Lauren is modelling, my almost finished outfit. The apron still needs the red cross, but the sleeve protectors are made. I fastened them with a button on the cuffs but the tops are tightened by a lace.

My sister Michelle is modelling the final costume. This was on display at the Dorman Museum, Middlesbrough but I believe this exhibition is now closed. Therefore I should be expecting this costume back any day soon.